Review: RM3 Forcing the Sure
I continue with my solo play of Race for the Meuse. Today, we move a bit north into Bodange--I thought we were supposed to ESCAPE from Bodange! :))


As the Belgians think of it, "A Town Called Panic!" This is the first scenario in the pack with AFV's--a couple of German armored cars. The Germans have a pretty mighty balance of forces, 7 squads to 4. The Germans get a leichtinfantreegeschutz (which is worth a lot of points--in Scrabble.) The scenario figures around the DD8 bridge, which is kind of cool.
If you remember, the second scenario centers around the hill and fields just to the south of Bodange. Evidently, they didn't do as well as my Germans because they need help from the 3. Schutzenbattalion, just to the North of their position.
Last time, I screwed up helping the Belgians. This time, I screwed up helping the Germans, allowing them to start out with the armored cars (they are supposed to enter on turn 2.) This is a BIG advantage.
So given the outcome, I'd say this one favors the Belgians--but it probably wouldn't hurt the Germans to be less aggressive and pound the Belgians a little more.
Now, when I say "armored cars" I mean cars that are armored, not trucks carrying around valuables. These are anything but valuable and are used by me to soak up machine gun fire. Also, the LiG doesn't have smoke. I did not know that. In reality, I thought they were equipped with copious amounts of smoke ammo. But (stoopid brain disease) I thought wrong.
Remember, the Sure river is fordable.
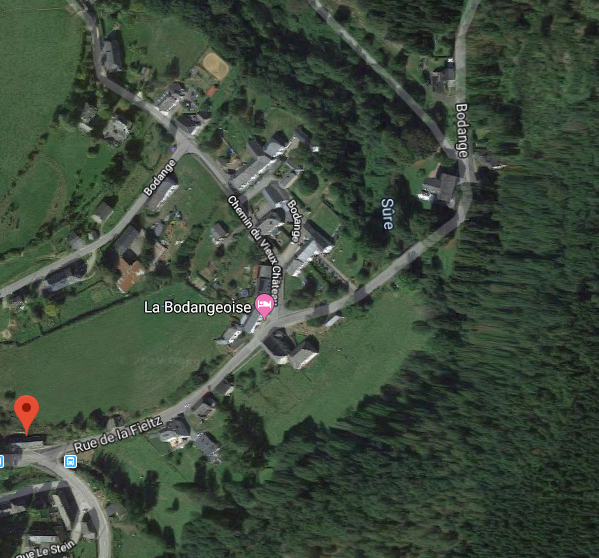
Here is the set up:

Not the best angle, but the gun is set up on the left, the light mortar on the right and way, way to the right is a half squad who has left his buddies behind to play with the mortar while they go in search of beer. It's always annoying to have a little guy running around in your rear area (at least, that's what Jazbutis always tells me...) so this guy's job is to be annoying.
Meanwhile, the 8-1 will pound anyone who shows his ugly Belgian face while the 9-1 and his boys will try to get under the wire.
Watch out. This one has more plot twists than a Guy Ritchie movie on cocaine (but aren't they all?)

Here's why the early armored cars make a difference. The PSW222 rolls up through the wire, through the mines and gets right in the pillbox's face. No bogging as the barbed wire is designed for cows to keep them from slipping out at night and selling their milk for bootleg brie. The machine guns rattle off the front of the turret. Now, Mr. 222 is not going to last forever taking point blank machine gun fire. Frankly, I don't care. He's still a hindrance and he knew what he was signing on for.
On the other hand, the HMG in the pillbox can't get real comfortable either with 75mm shells raining down on him through the gun slits.
The Belgians only have four squads and the crew in the pillbox. However, they do have two leaders this time. The VC are that the Belgians must have any unbroken MMC with a LOS to the bridge at game end. Not good order, just unbroken. They also have to be within 5 hexes, but to be honest there aren't many hexes that are more than 5 away that have LOS. The MMG are on each flank, because the Belgians set up first and didn't know where the Germans were coming from.

German turn two sees the brave souls who tried to cross the bridge broken and the PSW221 go after the broken MMG squad who made the mistake of taunting the infantry gun a second time. The pillbox and the PSW222 trade ineffective fire and Mr. Annoying got stopped by the MMG on the Belgian left. Three of the five real Belgian units are revealed. Both armored cars are testing the limits of Krupps' face hardened steel.

End of Belgian turn 3 and the 222 can't take the heat. He's down and the 7-0 and 467 are back in the safety of the gun's covered arc. It's already turn three and there are now three Belgian squads revealed, but only one broken. The only Germans on the other side of the river are in an armored car that is starting to leak some oil.

A lucky shot from the 75 breaks the MMG squad, allowing the 8-1 and 467 to cut off the lifeline of the broken Belgian in cooperation with the 221. The last 457 pops up to say "hello" and then pops back down again failing his PAATC. The Belgians are now in a bit of a predicament as they have a broken squad, a squad that is a prisoner and the crew in the pillbox. The Lt. Mortar squad has abandoned all hope and are running for the closest beerhall where they take Reichsmarks--thanks for playing...

The 221 croaks to another MG shot, but the Belgians are forced to shoot their former comrades as the Germans have decked their prisoners out in Dirdnles and pushed them out ahead. Generally, Belgians don't mind dressing up in women's clothes, so this wasn't that hard to do, but it has become really important to keep prisoners alive in order to rescue them later from the myriad of half squads. Above, however, we see the results of playing with fire. The 75 has just managed to score a hit on the pillbox crew and then decorate the insides of the pillbox with their insides (K/2.) However, this allowed the MMG platoon with the 9-1 to try and brave the wire and the minefields. They did not. Rout into the Sure, Nazi scum.

And the pyromania punishment continues. The 8-1 and a half-squad, by now accepting that they will not come back from an afternoon under Oberleutnant Hundsdorfer, go into close combat with the Belgian 9-1. Ah but this guy is made of sterner stuff than the 9-1 in the previous scenario. He is Rambeaux. With a snake eyes, he kills the lot of them. What's more, he is set up for having a go at the half squad guarding half of his OB.

And in the ne next Belgian turn Rambeaux calls some of the A Team and goes after that little swine holding the prisoners. That particular set of Germans decides to attack his prisoners, rather than his assailants in an effort to at least cut down on the number of Belgian squads. While the odds are stacked against him, no one is more proficient than committing war crimes than the Wehrmacht (not even Henry V at Agincourt) and a squad and a half of prisoners bid Adieu. But with just a single good order half squad west of the rive gauche, the main stack of MMG studs hiding out in the water, the Germans are thinking about calling for the reinforcements they have already got.

End of Belgian Turn 4, there is now only one good order Belgian MMC left. With the help of a lowly corporal, the Lieutenant is back up and ready to fight. Is it possible?

German turn 6, the last good order squad has to survive all attacks and then survive close combat. After prep fire, he's pinned. After advance phase, he's in CC. In CC, he faces a 3:2 which makes him quite dead. Turns out, he didn't have LOS to the bridge anyway but I didn't know that because I'm too lazy to string a LOS string in what the British would call a Kerfuffle. Is it legal anyway? To check a LOS simply for Victory conditions?
A good time was had by me. The Germans are now 3-0 in this module, but considering the level of cheating that went on in this game they simply must hang their head in shame. No prisoners were rescued. No armored cars survived. It came down to the last CC. The star of the show was the ugly little light infantry howitzer. And now I have to go and clean out the pillbox.
It's another nice scenario from this pack. Small, fast and should come down to the wire. Yeah, I messed it up, but I think it's still balanced with the Germans coming in later. I like the tight in feeling with the boomer going off into the pillbox or the stone buildings while the Germans have to suffer through the wires and mines.
What can I say, it is a very fine map and some very interesting scenarios. Most of the way through this, I can say the price is bargain basement with a lot of quality packed in.


Comments